10% off Windor 3750 Multi-Slide Doors - Request a Quote Today!

Installing a Horizontal Sliding Replacement Window

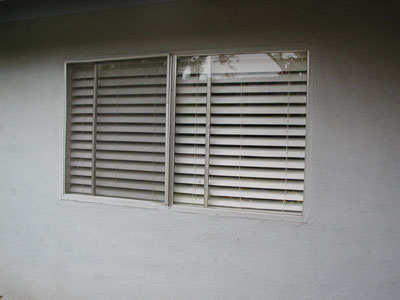
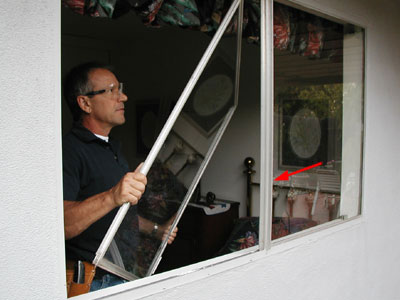
These are the steps involved in a typical aluminum horizontal sliding window to horizontal replacement installation. Every situation is different and it is impossible to represent every one here but the fundamentals are the same for this type of replacement. If you have a different type of window removal or installation than the one featured, please e-mail us. If possible, include a digital image to give us a better idea of your window. We will get back to you shortly to let you know how to replace it or whether we think you need professional help.

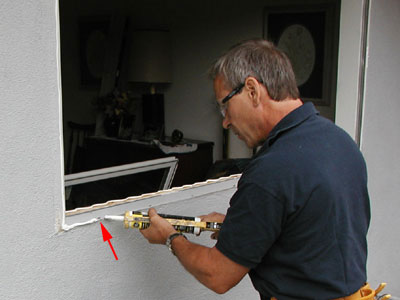
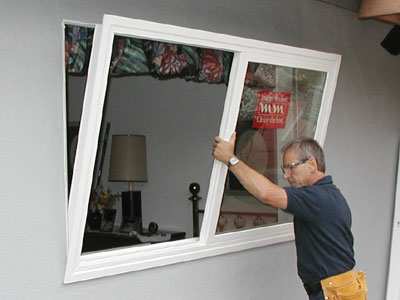
Handling glass is very dangerous so use every precaution when removing and replacing your windows.

In compiling this instruction manual, we followed all recommended guidelines from both the window manufacturer (Milgard) and AAMA (American Architectural Manufacturers Association).

step 1

Step 1.

Starting with the original window, measure the opening for the replacment window and order the window. For information on measuring for the new window see How To Measure.

step 2

Step 2.

After having received the new windows, verify that their dimensions are to your order and that their corresponding openings are correct. This is so that in the unlikely event that you mismeasured the first time or we have sent you the wrong window, you don't remove the old window and have an incorrect replacement. Generally it is better to remove and install one window at a time so that you are sure to complete every window that you start.

Typically, on a horizontal sliding window the moveable panel is removed by opening the window all of the way then lifting the panel up and pulling the bottom out towards you. Then the vertical bar that holds the fixed panel in (see red arrow) is removed by carefully tapping it towards the opening in the window or away from the fixed panel. This bar may be held in by a screw so remove it if it is. Then slide the fixed panel over towards the opening and it should lift out like the moveable panel did.

step 3

Step 3.

Next, lay down a wooden sill strip to give the new window sill a continuous, flat surface to rest on. A good material for this is plywood that is cut in a narrow strip. This sill strip is installed to make sure that the new window sill has a good surface to rest on to eliminate the possiblilty of sagging.

clearance sill strip

This strip has to be at least as thick as the difference between the sill and the highest point of the existng frame but no more than 1/4" thicker. Also, the strip cannot be wider than the part of the replacement window that extends beyond the exisiting frame. See the image below to maintain the proper clearance in the 2 places (D1 and D2 dimensions) noted. The reason for this is so that the new window sits on the sill strip and not on the exisitng frame and that the sill strip does not interfere with the interior trim that you will be applying later (D2). Make sure that the D1 dimension (the distance between the bottom of the window and the highest point on the existing frame) is not more than 3/8" or the height of the opening will be too little for the new window.

step 4

Step 4.

The window is dry fitted at this point and the outline of the new window is marked for the next step.

step 5

Step 5.

High points in the stucco are removed so that the window will fit flush with the stucco wall.

step 6

Step 6.

A high quality sealant is applied to the sill strip and the outside face of the exisiting frame to prevent any leaks. Make sure this is a paintable, preferably siliconized, outdoor sealant. In the unlikely event that moisture does find its way in, the weep holes from the old frame (if any) are left open to vent any moisture that may accumulate (see red arrow). This is an important step because if this moisture is trapped it can lead to the development of mold in the old frame. With the exisitng frame left intact and the new window properly installed and sealed, the opening is even more watertight than it was with the original window.

Remember, your installation is only as watertight as you make it at this point. Use a liberal amount of sealant on the existing frame to guarantee a continuous seal around the new window.

step 7

Step 7.

The window is now ready for the final placement. At this point you will need assistance so that one person can hold the window in place while the other person proceeds to Step 8.

step 8

Step 8.

Make sure the window is relatively centered in the opening from an inside perspective and have someone press the window firmly against the exterior of the house. Holes (2) are drilled through the frame in each side about 4" from top and bottom and the window is secured by 4 screws with hinged covers.

Position your screws in the inside track where the operable (sliding) sash is located. Never put screws in the bottom or sill of the window, only on the sides.

The screws should be just tight enough to hold the window in place. A screw that is too tight can distort the window so always watch the frame as the screw goes in and see when the frame moves. A good rule of thumb is to tighten the screws to where they just hold the hinged screw cover snug and no more because when the caulk cures, it will hold the window securely in place.

window unsquare

Step 9.

Now that you have the window secured in the opening, check to see how well the window is aligned when it closes. Sometimes the gap is uneven and this can be corrected with the screws.

First determine which direction the window needs to move. In this case the top needs to go right and the bottom needs to go left so you first loosen the screws on the top and the bottom that are opposite to the direction you want to move the window. In other words, loosen the top left one and the bottom right one. Now tighten up the screws in the corners where you want the window to move towards.

window square

Keep adjusting the screws in each corner while checking the gap. Each screw should be adjusted a little each time so that you take up the slack evenly, top to bottom, and so that the whole window isn't pulled off center. Be careful not to pull too hard on any one screw because you could damage the window.When the gap is even (or as close as you can get it) from top to bottom, snug up the loose screws again being careful not to draw the window out of square.

step 10

Step 10.

Finally the frame is finish caulked to make sure there are no gaps and to give it a finished look. Apply the caulk evenly and finish it by smoothing it with your finger. Have water and a rag on hand for this because it can get a little messy.

step 10a

Always leave 2 or more openings in the caulk in the bottom to allow moisture to vent. Again, this is an important step toward reducing the risk of accumulating water in pockets

step 11

Step 11

The Finished Product.